Context
The PRGDA is a very cool community of game developers from 🎉Puerto Rico (my home! WEPA!) 🎉, and they put together this very nice game jam called What the Jam?!. The theme was...

Note: The awesome event artwork you're seeing was done by:
- Payla Ayala López: @paula__uve
- Luis "Leo" Lebrón: @LeoLebronPR
They were also quite involved in helping organize this awesome event!
And knowing this, one of the first thoughts that came to mind is how when we(very common in PR), as kids played this game called Stop!, but we pronounced with our Spanish style as Estop!.
Estop! is a Simple Game:
Every player needs just a pen/pencil, and a blank paper sheet.
Every player draws a table with a few columns containing specific categories (Name, Last Name, Country or County, Movie or Series, Animal, etc.). The last column is the score of each row, and every row is 1 round.
After everyone is prepared, the game can start. 1 person says the letter
Aout loud, and in their head, they start counting down the alphabet at whatever speed they choose.Another player can say ESTOP!, and the player counting down the alphabet has to say which letter they had in their mind.
With the letter chosen, let's say the letter
Das an example, every player has to fill in an entry starting with that letter:Name: Daniel, Last Name: Dominguez, County: Dorado, and so on...
When a player writes down something for every column, they yell
ESTOP!, and they count down from10to0, roughly 10 seconds in total.When the "timer" reaches 0, everyone stops writing, and all players check their entries:
- If an entry is valid, and not repeated, that's
10 pointsfor that entry. - If you repeat an entry with another player, it's only
5 points. - Empty entries give
0 points
- If an entry is valid, and not repeated, that's
You play as many rounds as you'd like, and then whoever has the most points with all of the rounds combined wins the game!
Setting up Unity & UGS!
I decided to use Unity 2021.3.6 LTS for my project.
And against my best judgement, I decided to go for a MULTIPLAYER implementation of "Estop!", even though I only had 48 hours, and I only had time to work at most 11 of those hours. I love making games, but one has to enjoy the weekend too!
Wish me luck! 🤞🏽🍀
I'll be using Unity's high-level networking library, Netcode for GameObjects, and attempt to use the Relay service, to add P2P connections.
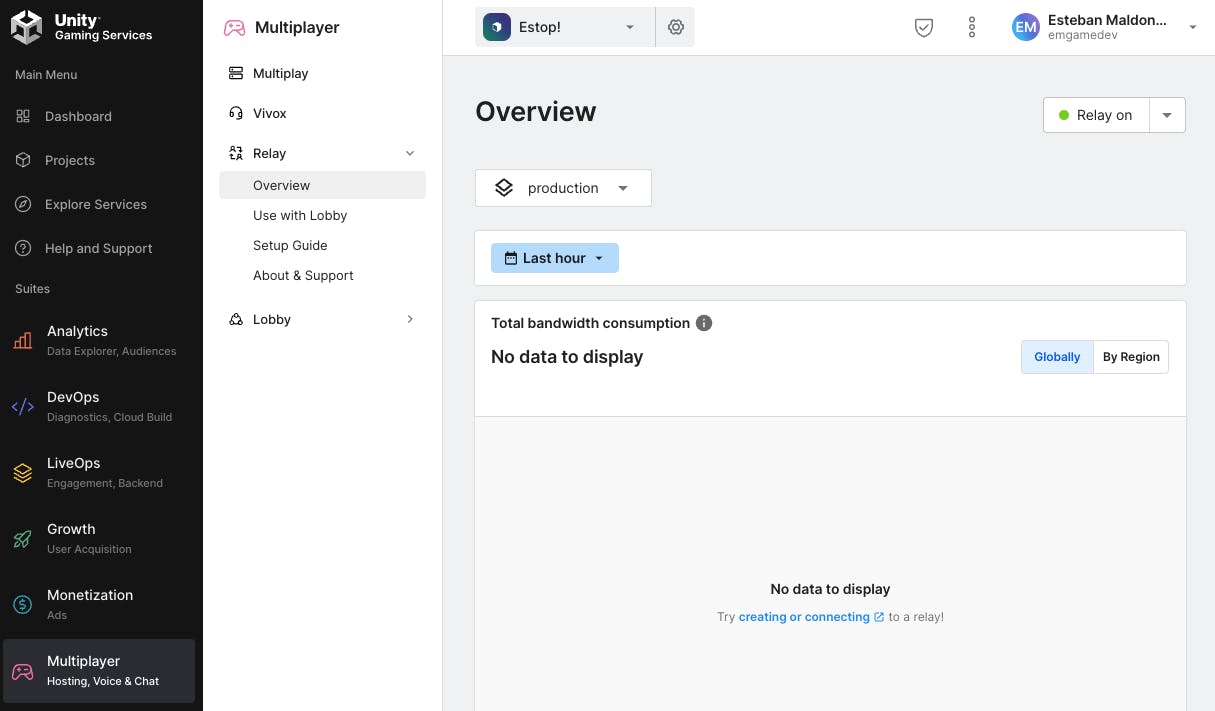
First step for using Unity Gaming Services (UGS) is to create a project on your Unity dashboard, which requires creating a free Unity account:
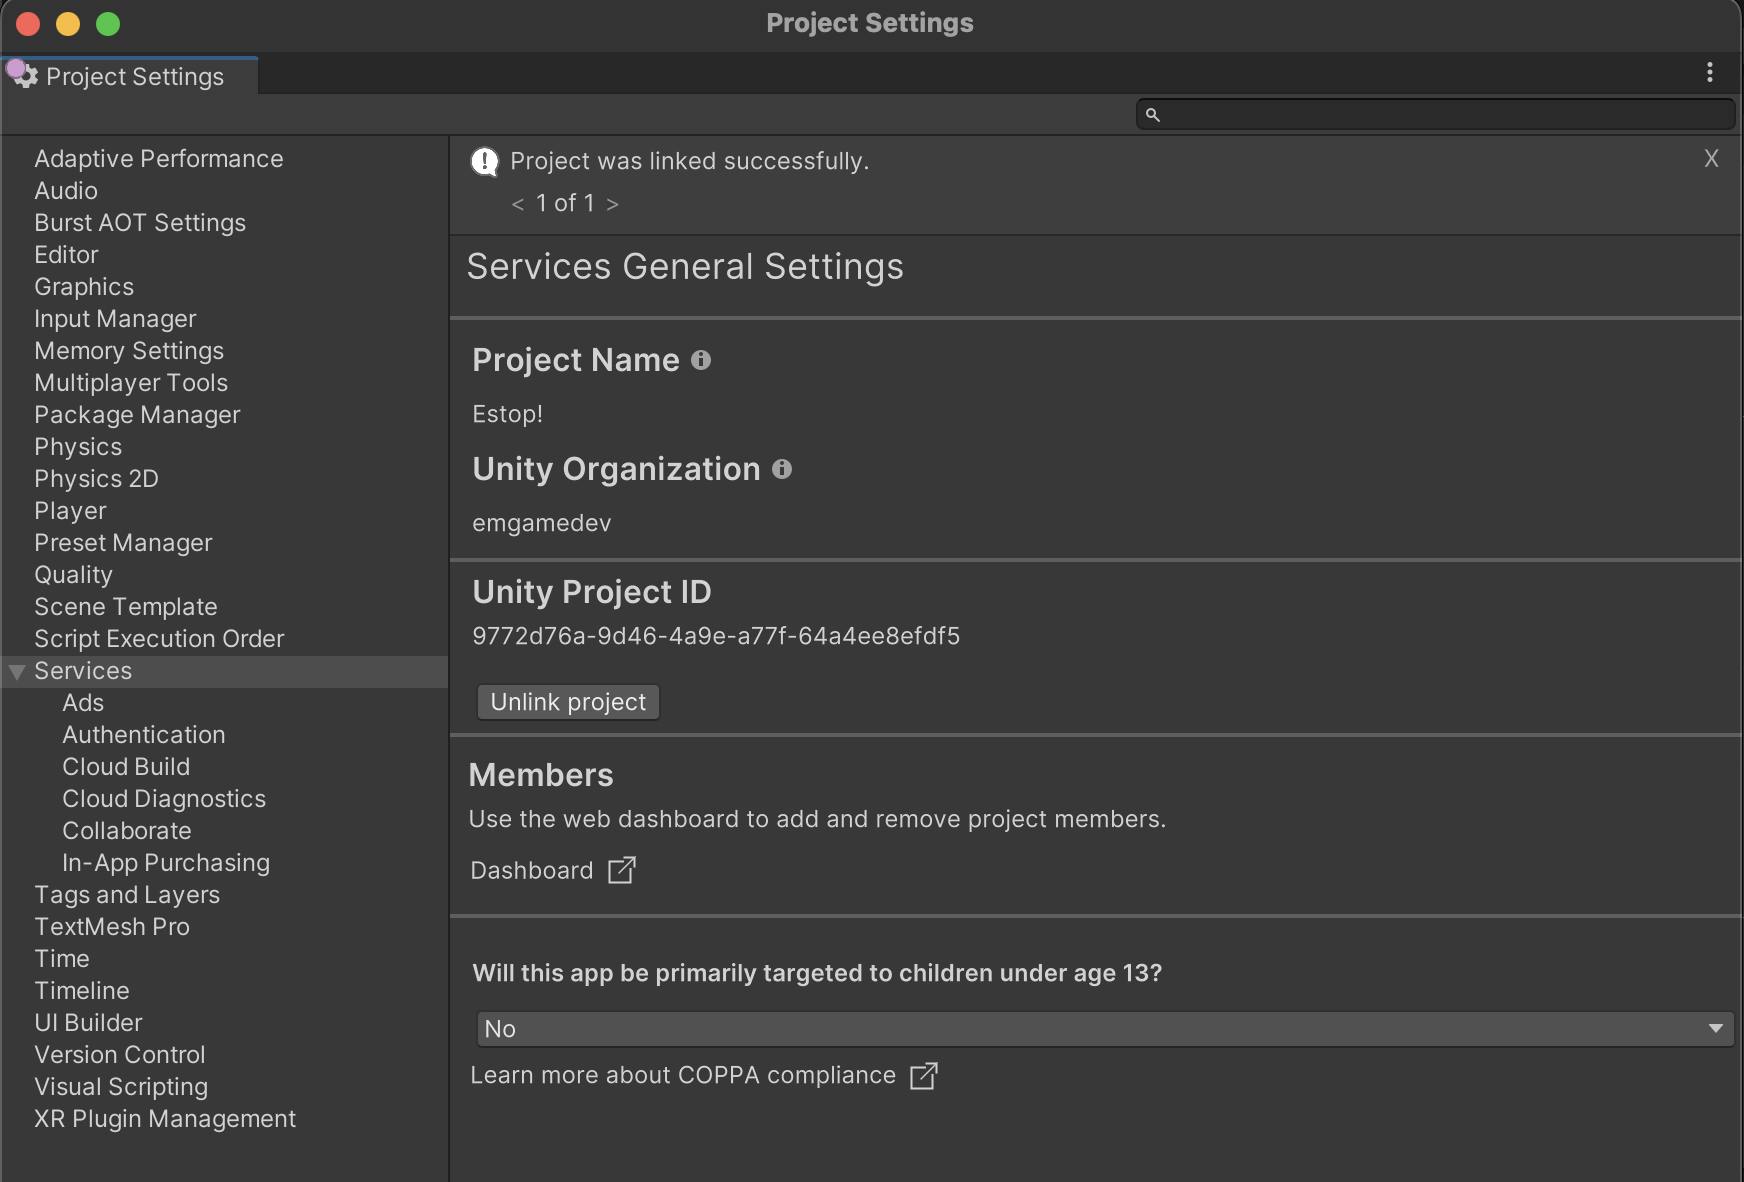
After creating the project on the Unity Dashboard, create your new Unity project, and link it with the dashboard one. Go to your Project Settings and in that window, select the Services tab on the left side:

You'll get a prompt asking you to confirm your choice:

You'll then see your project successfully linked:
Setting up the Network Manager
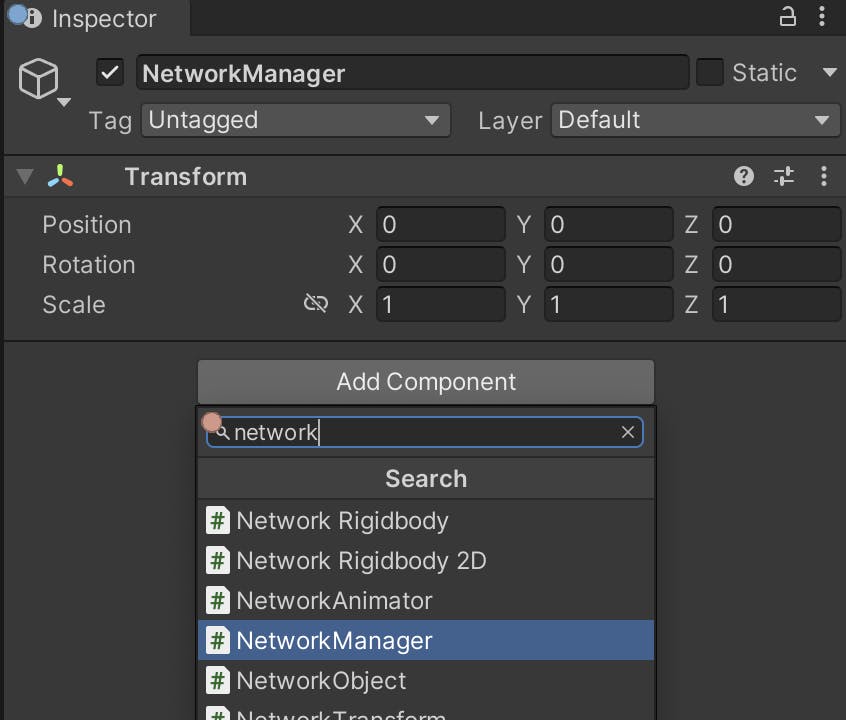
When using NGO, the first step is to create a Network Manager. This is the GO responsible of holding the information on how data will be sent from client to client. Let's go ahead and create a new GameObject called NetworkManager:

And we'll add the NetworkManager component to it, which comes with the NGO package:
After adding the component, we need to first specify the transport of the NW. The transport is the way in which packets of data will be sent. It's best to use UnityTransport, since it's the latest transport package. The UNet option is the old option, and will be deprecated:

This will automatically add a new script component called Unity Transport:

Note: We'll first start testing on local network, but we'll switch it later to the
Relay Unity Transportwhen I'm ready to take this online, hopefully if we make it. 😅
Enter the first Script!
So now that we have our object that sets up the NetworkManager, let's create another one that will take us to the future main menu!
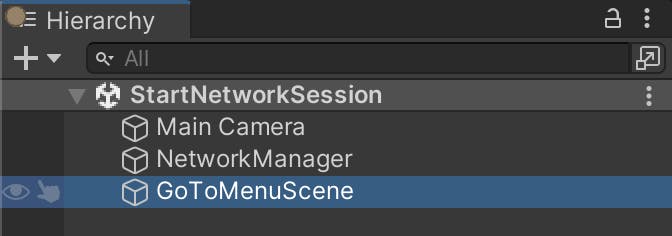
I'll create a new GO named GoToMenuScene:
And of course, create a new scene that is called MainMenu. We can leave it empty for now:
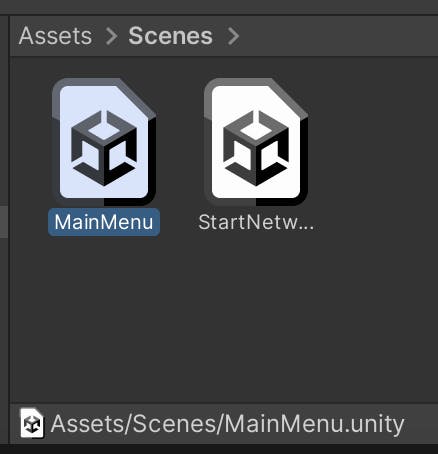
Note: Remember to add any new scenes that will be part of your final project in the project's
File > Build Settings....
And after that, attach this new simple script to the GoToMenuScene GameObject:
using UnityEngine;
using UnityEngine.SceneManagement;

public class GoToMainMenuScene : MonoBehaviour
{
    private float m_timer = 1f;

    private void Update()
    {
        m_timer -= Time.deltaTime;

        if (m_timer <= 0f)
        {
            SceneManager.LoadScene("MainMenu");
        }
    }
}
Main Menu UI!
Create a new UI Document GameObject, and change its name to MainMenu:
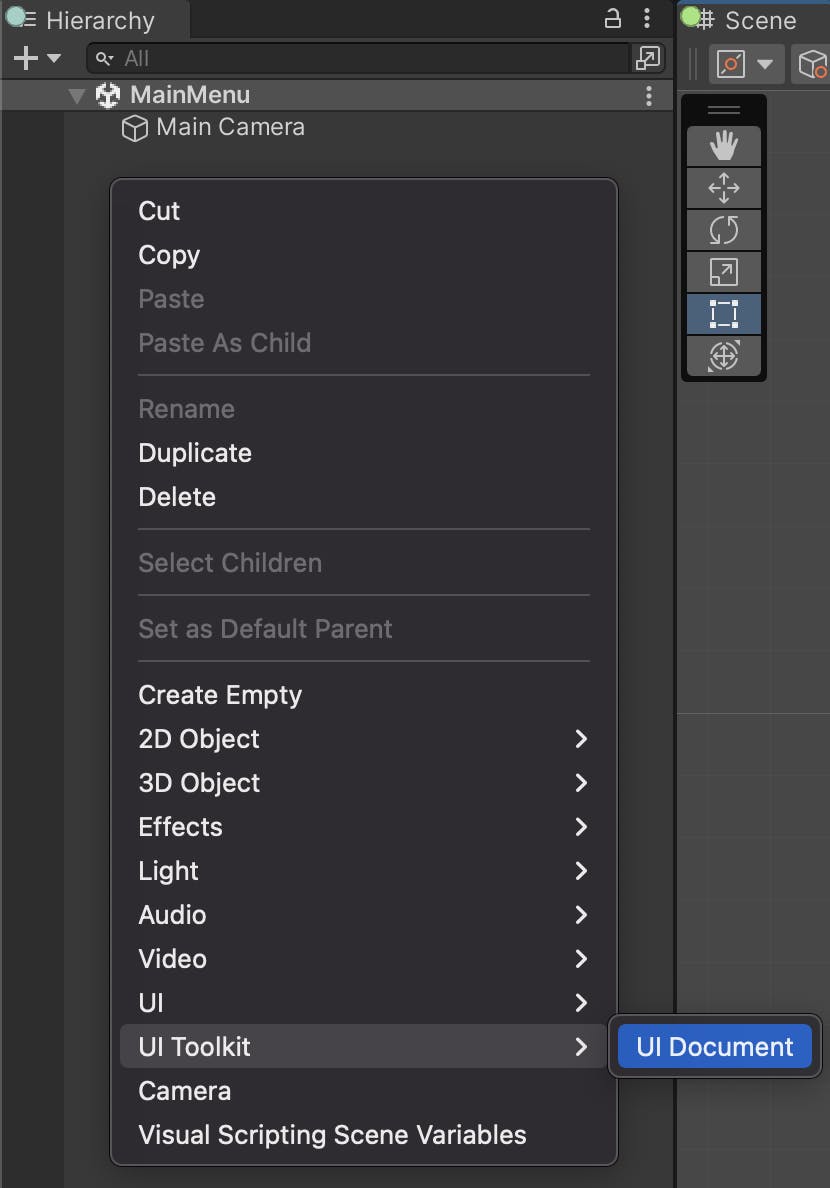
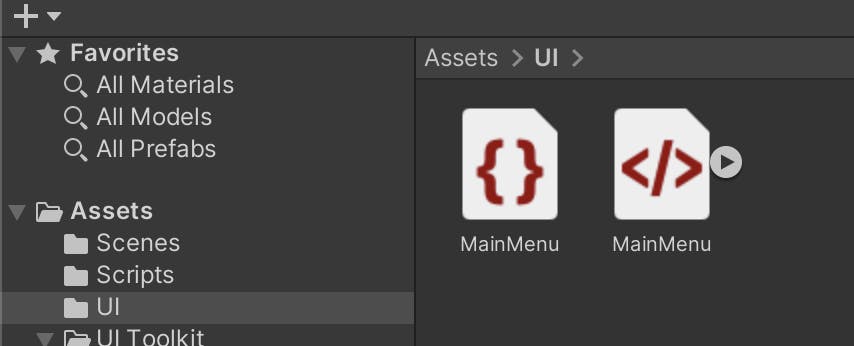
This new GO will hold the UI code, using Unity's UI Toolkit. We'll do just that. On the Assets/UI/ folder, create a new UXML file, by going into Create > UI Toolkit > UI Document using the right-click menu. Name this file MainMenu. Afterwards, create the USS stylesheet we'll use y going into Create > UI Toolkit > Stylesheet. Afterwards you'll get this:
We don't need a super designed UI for this so let's just take care of the basics. Open the MainMenu.uxml file and write down a title and 3 buttons:
<ui:UXML xmlns:ui="UnityEngine.UIElements" xmlns:uie="UnityEditor.UIElements"
xsi="http://www.w3.org/2001/XMLSchema-instance"
engine="UnityEngine.UIElements"
editor="UnityEditor.UIElements"
noNamespaceSchemaLocation="../../UIElementsSchema/UIElements.xsd"
editor-extension-mode="False">
<Style src="project://database/Assets/UI/MainMenu.uss?fileID=7433441132597879392&guid=21a49f533ed4848d8848f1ba7fb86855&type=3#MainMenu" />
<ui:VisualElement name="TitleDivider" />
<ui:VisualElement name="TitleSection">
<ui:Label text="ESTOP!" display-tooltip-when-elided="true" name="titleLabel" />
</ui:VisualElement>
<ui:VisualElement name="TitleDivider" />
<ui:VisualElement name="MenuButtons">
<ui:Button name="HostButton" text="Host Session" />
<ui:Button name="JoinButton" text="Join Session" />
<ui:Button name="QuitButton" text="Quit Game" />
</ui:VisualElement>
</ui:UXML>
And then just a little bit of "style" on the MainMenu.uss:
#TitleSection {
    align-items: center;
    height: 100px;
    justify-content: center;
}

#titleLabel {
    font-size: 100px;
    color: beige;
}

#TitleDivider {
    height: 140px;
}

#MenuButtons {
    align-items: center;
    width: 100%;
}

Button {
    color: black;
    width: 200px;
    font-size: 20px;
}
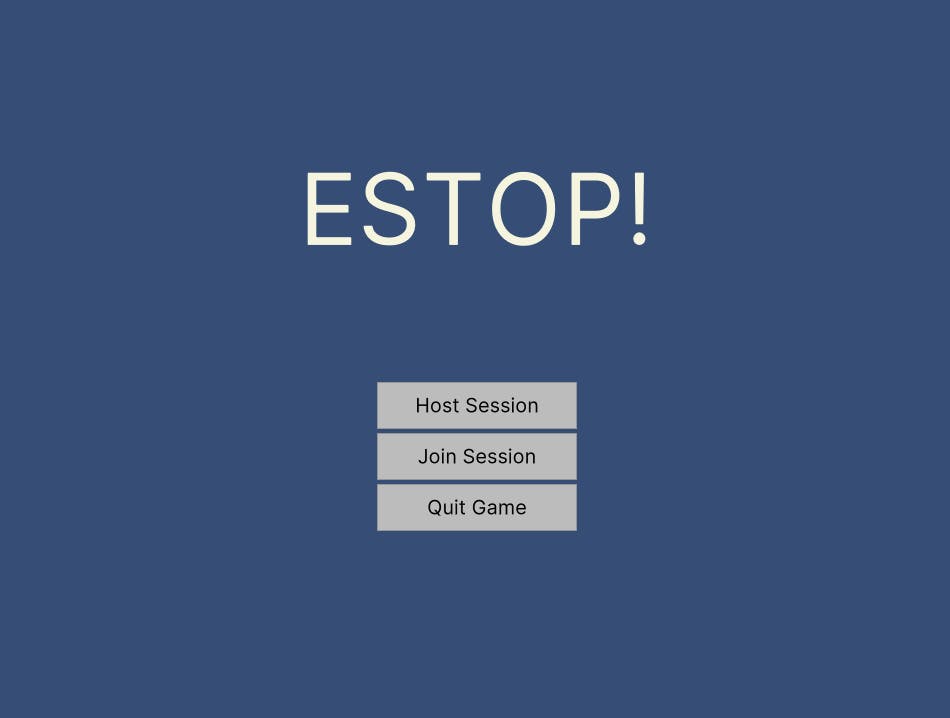
This gives us our 3 main options which is to host a session, join one, or just quit the game:
Please let me know what you think!
What we've achieved so far:
- Picked a (hopefully)good idea, based on the game jam theme
- Setting up UGS for the project
- Setting up the Network Manager for the network session
- Setting a very plain, but useful UI for a main menu
Next up...
I'll split this story in 2 posts. On the next one I'll go over how I setup the gameplay logic (as much as I could), and then go over the lessons learned in this experiment.
I'd like to know...
- Have you tried to making a multiplayer game in such a small time?
- How interested are you in applying multiplayer to your next project?
🎉🎉🎉 Happy coding! 🎉🎉🎉